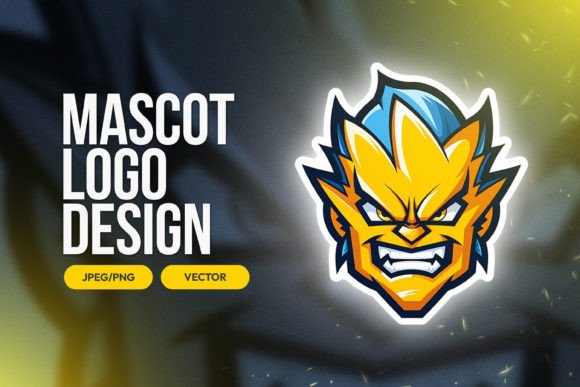
Ninja Gaming - Mascot Esport Logo
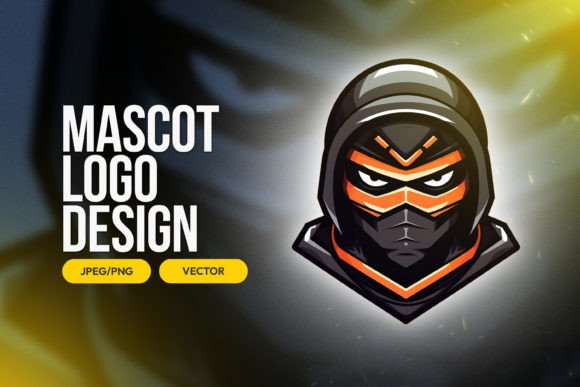
Stepping into the competitive gaming scene with a unified brand identity can change how people see your team, stream, or community. The Ninja Mascot Esports logo blends a sleek, agile figure with the bold energy of modern gaming culture. It is delivered as professional artwork you can use across t‑shirts, hoodies, banners, overlays, social media, and merchandise. The package makes your life easier by including the formats you actually need: a true vector EPS 10 file so you never lose sharpness when resizing, plus ready‑to‑use PNG and JPEG files at 3000 x 3000 pixels for immediate digital application. That sounds straightforward, yet many people leave quality, clarity, and compatibility on the table because they skip a few details that matter.
Your mascot logo is more than decoration. It carries the personality of your brand. Get the handling right, and your emblem stays razor‑sharp on a giant event banner the same way it does on a Discord avatar. Get it wrong, and you wrestle with fuzzy edges, broken transparency, or wasted time re‑ordering prints. The following guidance helps you dodge those outcomes and make the most of the artwork you receive.
Why File Format Confusion Hurts Teams Before They Even Launch
The most common misstep we see is treating all image files as interchangeable. Someone grabs the JPEG, passes it to a printer, and wonders why the result looks soft or shows a white rectangle around the mascot. Another creator wires the PNG into a large‑format design without checking whether the native resolution holds up at that size. These small choices cascade into a professional look feeling amateur.
The EPS file is the anchor of the package. Because it is built from mathematical paths rather than pixels, you can enlarge it to the size of a wall mural and every contour stays crisp. For apparel, signage, vehicle wraps, or any physical product that demands clean edges under magnification, the EPS is your non‑negotiable starting point. Many beginners avoid vector files because they assume the software is too complex. In reality, a print shop or a designer familiar with Adobe Illustrator, CorelDRAW, or Affinity Designer can open the EPS in seconds and export exactly the size and color profile required.
The PNG delivers a transparent background and sufficient pixel dimensions for most screens. Stream overlays, website headers, and social posts thrive on this format. Keep in mind the 3000‑pixel width only guarantees clarity up to a certain physical size. When you push a PNG beyond its native resolution, the image interpolates and introduces softness. If you need a storefront banner at six feet wide, you will get far better results by scaling the EPS to that size and saving a fresh raster copy, rather than stretching the fixed pixel file.
JPEG is the lightweight workhorse for previews, emails, and quick mockups. Its compressed nature makes it unsuitable for print production where edge definition matters. Using it for final merchandise files is a classic pitfall that leads to rework costs and disappointed players.
Overlooking Scalability Creates a Brand That Looks Different Everywhere
Scalability means more than just resizing. It means your logo maintains visual balance, legibility, and impact at any dimension. The Ninja Mascot Esports logo is built with this principle from the start, but the user still controls how that translates into the real world. A frequent error is delivering the same file for both a 1‑inch embroidered patch and a 10‑foot backdrop. The tiny patch might lose the fine strokes in the ninja’s silhouette unless you adapt the artwork with thicker lines or simplified details. The giant backdrop can handle the full intricacy, but only if you supply a genuinely resolution‑independent source – which brings you right back to using the EPS.
Before you send the logo to any vendor, ask yourself the end size. For anything smaller than an inch and a half, test a simplified variant that preserves the ninja’s stance without microscopic details. For oversized prints, provide the vector file and ask the printer to confirm the output resolution. This avoids the woolly, upscaled look that screams “I used a screenshot.”
Color Gamut and Background Assumptions That Sabotage Your Design
An often‑missed dimension is how colors behave on screen versus paper. Your vibrant neon‑trimmed ninja looks electric on a gaming monitor because displays use the RGB color space. Print processes rely on CMYK inks, which cannot reproduce every glowing hue you see backlit. If you send an RGB file to a t‑shirt printer without converting to CMYK and previewing the shift, the final garment may look muddy or dull. The EPS file gives you the flexibility to assign the correct color profile. Work with your printer to determine whether they prefer the native CMYK vector or want you to handle the conversion.
Background transparency is another silent culprit. The PNG file comes with a clear background, making it perfect for placing the mascot over gameplay footage or textured backdrops without a visible bounding box. The JPEG, by contrast, always fills the background with solid white or whatever color was exported. Placing that JPEG on a dark stream layout reveals an awkward rectangular patch. Many creators burn hours trying to remove that background manually when the simple fix is to start with the PNG or the EPS from the beginning.
Applying the Mascot Without Diluting Your Identity
Beyond technical execution, how you place and pair the logo shapes audience perception. Some teams make the mistake of shrinking the mascot until it becomes an unrecognizable smudge in the corner of a stream. Others inflate it so aggressively that it overwhelms the content, turning the channel into a vague blur of graphics. A balanced approach treats the ninja as a recognizable signature, not a watermark that fights for attention.
Consistency across platforms builds familiarity. Use the same clear space around the logo, the same color treatment, and the same orientation wherever it appears. When you mix a full‑color mascot on Twitch with a monotone version on Twitter without explanation, the fragmentation can confuse followers. Create a simple style guide for yourself: decide on minimum size, primary layout, and when to use the full emblem versus just the typography. You do not need to be a design agency, just intentional.
Practical Examples of Better Logo Workflows
Imagine a five‑player team preparing for their first regional tournament. They commission jerseys and want the ninja on the chest. Instead of emailing the JPEG, they provide the EPS to the apparel decorator, specify a chest print width of 3.5 inches, and ask for a screen‑printed transfer. The decorator scales the vector, checks the color separation, and produces a sharp result that lasts multiple washes. Meanwhile, the team uses the PNG for a clean overlay during scrim streams, sized at around 300 pixels tall to sit discreetly in the lower third. They export social graphics from the same PNG at the platform’s recommended dimensions, never upscaling. Their brand looks polished across every touchpoint because each use case got the right file type adjusted to the right size.
On the other hand, a solo content creator grabs the JPEG, stretches it to fill a YouTube banner, and uploads it without checking. The mascot appears slightly blurred, the white box behind it clashes with the dark theme, and the visual impact that could have signaled professionalism instead hints at a learner’s oversight. The fix is small and immediate: open the PNG, place it on a dark canvas that matches the banner size exactly, and export at the original resolution. The quality jump is immediate and requires no advanced skill.
What to Verify Before You Download or Purchase
Not all mascot logo packages are created equal. Before you put money down, confirm you are getting a true vector format. Some sellers label a high‑resolution PNG as “scalable,” but a pixel file can never match the infinite flexibility of an EPS or AI file. Look for the explicit mention of EPS 10 or a similar vector standard. This package delivers exactly that, which puts you ahead of many vague offerings.
Next, check the licensing terms. If you plan to use the ninja on merchandise you sell, ensure commercial use is covered. Personal use only restrictions limit how you grow your brand. Similarly, verify whether you can modify the colors or add your team name without violating the agreement. These terms affect your long‑term satisfaction more than the initial price tag.
Also consider the artwork’s uniqueness. Generic mascots can appear elsewhere, diluting your identity. The design should have enough distinct character that viewers associate it with your presence. Study the silhouette, the pose, and how it reads in isolation. A strong mascot remains identifiable even when viewed as a single‑color icon, which is useful for social profile pictures and app badges.
Steering Clear of the Rush‑to‑Launch Trap
Excitement to reveal a new logo can push people to skip necessary checks. They apply the PNG to a dozen platforms, only to later realize they need a vector for a sponsor banner, or that the colors look off on merchandise because nobody converted to CMYK. Taking an hour upfront to organize your logo files, label them clearly, and create size‑specific exports saves repeated scrambles. Store the EPS master in a dedicated folder. Keep the PNG and JPEG accessible but rename them with dimensions so you never wonder which version you dropped into a project. This small habit prevents the “print ready” panic when a tournament organizer asks for a high‑resolution logo at the last minute.
You do not need to master graphic design to use this logo well. You simply need to respect the difference between the provided file types and apply the right one in the right place. The Ninja Mascot Esports logo is built to look professional and energetic whether it lives on a jersey, a stream, or a smartphone screen. Your mindful handling makes that potential real.